Normals in Modlab
"Normals" are image files with illumination information, that make visuals look more "3D". Cosmoteer uses normals, so you'll need to create them to prevent your new part/projectile from looking flatter than the rest of the game.
ModLab is software (a.k.a. "an app") that allows you to create normal maps of things automatically, among other things. This is great news if you are drawing any sort of custom sprites for parts, projectiles or even explosions for your mod.
ModLab was actually designed for some other spaceship game, but that's not a problem for our purposes.
This tutorial helps you make your first normals, which is quite short (a couple minutes) so you should know the process by heart after doing it a few times.
(If you are a professional artist or even just someone who knows ModLab better, feel free to improve upon this tutorial!)
Step 1 - Get ModLab
It is available completely free of charge on Steam. In case you didn't know, there are many things like this on the platform, not just games.
Download it. We assume you already have a sprite ready for use. If you don't, go and draw it then come back here.
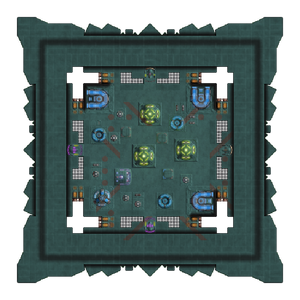
As my sprite, I used the ship below, which is the example for this tutorial. It's a PNG just like custom parts you draw, so they're the same thing as far as ModLab is concerned.
Step 2 - Launch ModLab
Like you would launch any game, just press Play.
There should be a welcome message with patch notes and such, you can just ignore it.
If you notice that the interface doesn't fit in your screen and you can't reach the top bar to move the window around, try minimizing ModLab from the taskbar icon then restoring it. If that doesn't work, via your computer's settings you can temporarily increase your screen's resolution or reduce the size of text, which should also fix the issue.
Step 3 - Load the Diffuse
The 'diffuse' refers to the diffuse map of your sprite, which is traditionally the texture that defines its color and pattern under normal lighting. For this tutorial, since we do not have a specific diffuse map, you will use your sprite as the diffuse. To load your sprite as the diffuse map, click the 'select file' button under the word "Diffuse" located in the top left corner of the main screen and select your sprite file.
You should now see your sprite in the center on a black background.
Light
You may click and rotate the arrow thingy around your sprite, to change how the light interacts with your sprite. There is a default orientation for light in Cosmoteer normals, not sure what exactly though.
If you clicked somewhere and the arrow disappeared, click "Composition" in the right side panel to get it back. You might also need to zoom out with the mouse wheel.
There are other parameters, but I don't know about them. Ask an artist or something.
Step 4 - Generate your normal map
A.k.a. "normals".
- First, in the left side panel, at the top of the "Normal" section, make sure the "Generate from Diffuse" box is ticked.
- Next, in the left side panel, at the very bottom of the "Normal" section, in the "Invert axis" line, tick the "Y" box.
- Now generating the normals is as easy as pressing the "Normals" button in the top-right corner of the screen.
- Don't forget to press the floppy disk icon just right of the "Normals" button, to save it somewhere. Don't save it directly into your mod folder (see the next section).
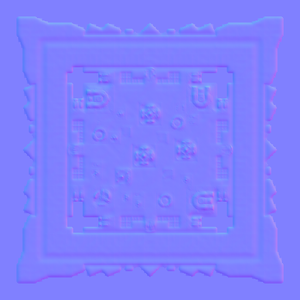
If you did it correctly, you get the equivalent of this for your sprite :
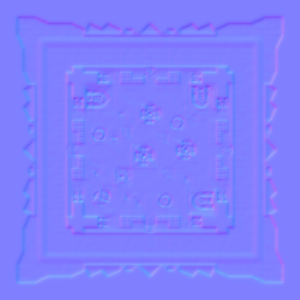
If you forgot to invert the Y axis, you get the equivalent of this instead :
You can see that this one looks like the opposite of what we want, with lows high, and highs low.
Step 5 - Cut the alpha out
As you may have noticed, the alpha isn't correct : the background has normals too, but it's empty space and doesn't need that.
Open your drawing software of choice, put your source sprite in a layer, and use its alpha / transparent pixels / empty space to cut your generated normals properly with "Contiguous selection" tool or similar.
You can now save your normals into your mod folder, it's ready for use!
Optional
- Right-click to move the view around.
- To refresh the interface for your next sprite, press "New" at the top-left. This keeps your boxes ticked.
- You may click "Save preset" in the top-left corner to make the whole process even faster the next time you do it. Then use "Load preset" whenever needed.
- You can experiment with the other settings, but then you're on your own until we get more information about how they work. See the tip above to save them.
- If you think the end rsult is too blurry or got some things wrong, consider applying this other normals tutorial to fix the issues.
Troubleshooting
- I pressed "Normal" in top-right corner but there's only empty space in the center!
> "Generate from Diffuse" is probably not ticked.
- My normals are inverted, highs are low and lows are high?!
> Redo the steps without forgetting to flip the Y axis. If you somehow lost access to everything in the meantime, you can invert normals after the fact, through this technique described on the official Discord :
To flip a normal horizontally, invert the red channel.
To flip it vertically, invert the green channel.
- Kroom (official game artist)


