Guides Hub/Sun-mining
Some may have noticed that asteroids with a lot of expensive materials such as Uranium or Tritanium are inside of the sun‘s red zone. It is often impossible to mine them without entering said zone. This is why this Guide exists.
Sun-mining is the process of entering the sun‘s damage zone, which is colored red as a warning, to extract expensive minerals. Despite this technique’s name, you don’t mine the Sun itself: You mine the asteroids near it. For this, you will need a ship that can withstand the incoming damage. This guide will help you build your own Sun-mining ship/modify your mining ship to fit this task. It will also lead you through the process of Sun-mining and the different strategies you can use.
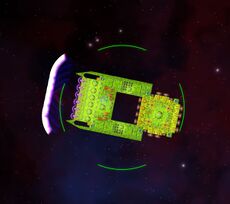
How does a ship enter the red zone and not burn up? The answer is simple: Shields. Shields block the incoming damage from the sun because that is the direction the damage is coming from. As long as you’re facing the sun, it will not be able to damage you. At least if you’re supplying the shields well enough.
Design
The design of your ship is very important, because your width is what decides how much damage you have to face. You want to reduce your width as much as possible without giving up functionality. You may even want to block some parts of your Large Shields to reduce their area, but this will give you less room for errors during the Execution.
It is also recommended that you have a Sensor Array to see your target earlier and to not have to fly too close to the sun (omg Greek mythology reference) to be 100% sure that you didn’t miss anything.
There are two techniques to extract the ores: You can either mine the asteroids inside of the red zone or outside of it by pulling them out.
Sundive
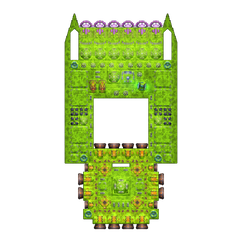
Choosing a Sundive design means that you will stay inside of the red zone to mine the asteroids there. This is much more risky than the other method but will take significantly less time. This design is heavily dependent on the Resource Collector since it allows picking up items without sending out crew, which would instantly get incinerated this close to the sun. This means that it is a requirement to either turn off all Airlocks or to set „Gathering“ to 0 in the crew priorities.
Shields
How many Shields you use is up to you. The more Shields you have, the less you have to optimise your ship for efficiency. The minimum for building functioning Sundivers is two Large Shields with two Medium Reactors, like this one. Looking at the size of the asteroids in the red zone, a ship with 4-6 Large Shields with one Medium Reactor each should be enough for fitting in all of the other parts you want to have.
Thrusters
You need strafing because you can’t turn your ship to move without being damaged. All other Movement is not that important and only increases speed slightly.
Storage
Sufficient Storage on your ship is also important. Asteroids in the red zone can hold ~200 ores each, which would result in 2.5 4x4 Storages filled. Add as much Storage as you think necessary.
To reasonably pick up all of that you should have at least a couple Resource Collectors.
Mining
You also have to add a couple of Mining Lasers and supply them. A Medium Reactor is enough for 3 Mining Lasers.
Extraction
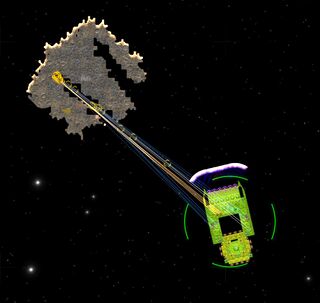
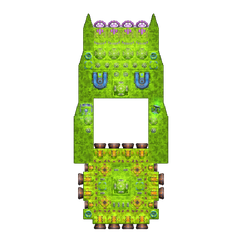
Choosing an Extraction design means that you will pull out the asteroid that you want to mine out of the red zone by using Tractor Beam Emitters and then extract the ore with your mining ship. Because of this, Resource Collectors will not be needed.
This is also why every Sun-mining video on YouTube before June 23rd 2023, so before the Resource Collectors got added, uses this method.
Tractor Beams
The Tractor Beam Emitters need a lot of energy. Just three Tractor Beam Emitters completely use up a Large Reactor. How many Tractor Beams you put on your ship is up to you. Also, set your Tractor Beams into either hold mode (the two arrows) or pull mode (the arrow pointing towards you).
Shields
This ship will not have to stay in the red zone as long and as deep as the other one, so having 4 Large Shield Generators and 4 Medium Reactors is enough in most cases.
Thrusters
You need good strafing and backwards mobility. Backwards mobility is important because you have to pull a giant asteroid so there is a lot of force needed.
Execution
The actual action of Sun-mining is simple. You just need to keep your shields oriented towards the center of the sun while scouting out where the resources are. Using the Strafe key (Standart: Z) to move and then occasionally using the Rotate key (Standart: R) to realign is the best option. You might even want to place a waypoint in the middle of the sun to not have to manually seek out that center when you align your ship.
Sundive
The plan is to scout out the red zone and to mine any ores you see. Remember to always have your shields aimed at the sun. Also, do not click on the asteroids to mine them, as that will aim your ship at them. Just fly near the Asteroid and use the Mine key (Standart: G).
Extraction
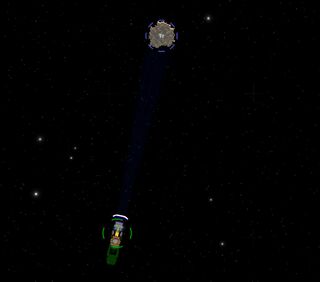
Just like the Sundive, you need to scout out the red zone. The difference is that you move until the asteroid is between you and the sun and then target the asteroid with your tractor beams. Then just use the Strafe key (Standart: Z) to move straight backwards until you’re outside of the red zone. Then just mine it like any other asteroid.
if you have anything to add, you're welcome to do so.
Guide made by CraftingCatIX

